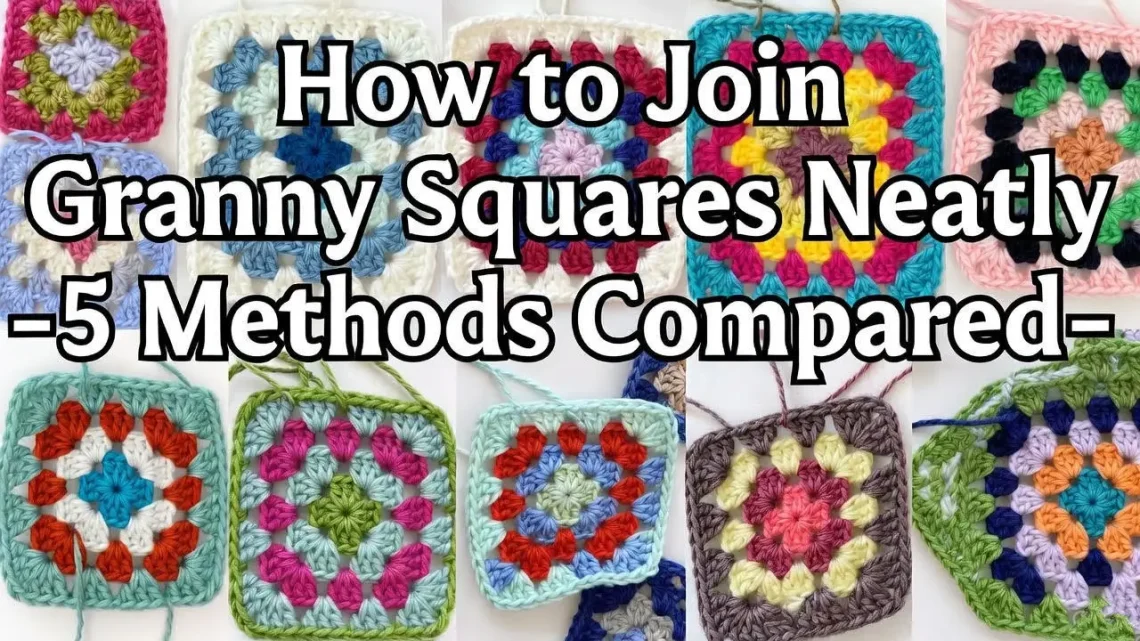
You’ve done the fun part: crocheted a glorious stack of colorful granny squares. They’re perfect little canvases of color and texture. But now they sit in a basket, and the daunting question looms: How do I put them together without ruining them? I’ve been there, staring at piles of squares for months, paralyzed by the fear of choosing the wrong joining method and ending up with stiff, bulky seams that detract from my hard work. I’ve tried them all—the good, the bad, and the truly ugly.
Joining is not an afterthought; it’s a design element. The right method can create flat, invisible seams, add a decorative ridge, or even become the star of the show. The wrong method can make your blanket stiff, puckered, or misaligned. In this guide, I’ll walk you through five trusted methods, complete with close-up photos. I’ll give you my brutally honest opinion on when to use each one, based on the drape, look, and effort you want. We’ll cover flat joins, raised joins, and the magical “join-as-you-go” technique that eliminates the sewing pile altogether. Let’s transform that stack into a cohesive, heirloom-quality blanket.
The Golden Rule: Block Before You Join!
I cannot stress this enough. Before you even think about joining, you must block each of your granny squares. Pin them to their exact finished size and shape. Why? Squares can vary slightly in size due to tension. Blocking ensures every square is identical, making alignment during joining effortless and resulting in a perfectly flat, professional finish. Skipping this step is the #1 cause of wavy, uneven blankets.
Method 1: The Invisible Mattress Stitch (Flat & Seamless)
Best for: A completely flat, nearly invisible join on the right side. Perfect for motifs where you don’t want the seam to interrupt the pattern.
How It Works (with Yarn Needle):
- Lay squares right side up, edges touching.
- Thread a tapestry needle with a length of yarn (use one of the project colors or a neutral).
- Insert needle under the back loop only of the edge stitch on the first square, then under the back loop only of the corresponding stitch on the second square.
- Weave in a zig-zag pattern, pulling snug but not tight every few stitches to close the gap. The seam lives on the wrong side, and the right side shows only a neat, continuous fabric.
My Take: This is my go-to for sophisticated afghans and wearables made from motifs. It requires patience and a good eye, but the result is worth it. It’s also very flexible and forgiving if your squares aren’t perfectly matched.
Method 2: The Slip Stitch Join (Simple & Decorative)
Best for: A visible, textured ridge that becomes a design feature. Adds a rustic, handmade charm. Creates a moderately flat join.
How It Works (with Crochet Hook):
- Place squares with right sides together (if you want the ridge on the back) or wrong sides together (if you want the ridge on the front).
- Insert hook through both loops of the corner stitches of both squares.
- Yarn over and pull through all loops on hook (completing a slip stitch).
- Continue, working one slip stitch through both loops of each corresponding stitch or space across the edge.
My Take: This is faster than sewing and adds a lovely, defined grid. It can be slightly less flexible than a sewn seam. I love it for blankets where I want a cozy, traditional look. Using a contrasting color for the join can make the squares really pop!
Method 3: The Single Crochet Join (Bold & Structural)
Best for: A very prominent, raised ridge. Adds substantial texture and strength. Great for bags, pillows, and blankets that need a durable, defined look.
How It Works (with Crochet Hook):
- Place squares with wrong sides together (so the ridge will be on the public side).
- Insert hook through both loops of the corner stitches, yarn over, pull up a loop, yarn over, pull through two (completing one sc).
- Continue working one sc in each pair of stitches/spaces across.
My Take: This creates a strong, almost braid-like seam. It uses more yarn and creates a heavier join. It’s fantastic for project bags or a blanket where you want a bold, graphic grid. It’s not the best for a drapey, lightweight blanket.
Method 4: The Whip Stitch Join (Quick & Easy Sewing)
Best for: Beginners to sewing seams. It’s very simple and fast. Creates a visible, utilitarian seam on one side.

How It Works (with Yarn Needle):
- Place squares with right sides together.
- Insert needle through both loops of the edge stitch on both squares, from back to front.
- Repeat, creating a simple over-and-over stitch along the edge.
My Take: It’s easy to learn but can be bulky and tends to pull the edges together, potentially creating a slight ridge on the right side. I use it mostly for joining squares for items like tote bags where the seam will be inside or isn’t critical. For heirloom blankets, I prefer the invisible mattress stitch.
Method 5: Join-As-You-Go (JAYGO) – The Game Changer
Best for: Anyone who hates sewing seams! You join squares on the final round of the second square, building the blanket as you crochet.
How It Works (Concept):
- Complete your first square as usual.
- When crocheting the final round of your second square, you work the corners and sides as normal until you reach the side that will attach to the first square.
- Instead of chaining across that side, you slip stitch or work a set of stitches into the corresponding space or chain of the first square, then continue with the next corner.
- This connects the squares as you finish the new one.
My Take: This method is brilliant for staying motivated—you see the blanket grow immediately. It requires planning your layout in advance and learning a specific sequence. It creates a very flat join, often a chain-space connection, that’s part of the design. It’s my top choice for large, multi-square projects because it distributes the joining work and avoids the dreaded “sewing day.”
Comparison Chart: How to Choose Your Method
| Method | Flatness | Speed | Skill Level | Best For | Visual Effect |
|---|---|---|---|---|---|
| Invisible Mattress Stitch | Very Flat | Slow | Intermediate | Heirloom blankets, wearables | Seam disappears |
| Slip Stitch Join | Moderately Flat | Medium | Beginner+ | Cozy, rustic blankets | Neat, defined ridge |
| Single Crochet Join | Raised | Medium | Beginner+ | Bags, pillows, bold blankets | Prominent, textured braid |
| Whip Stitch | Can Ridge | Fast | Beginner | Quick projects, inner linings | Utilitarian seam |
| Join-As-You-Go | Flat | Fast (once learned) | Intermediate | Large blankets, avoiding sewing | Integrated, seamless look |
My Pro-Tips for Flawless Joining
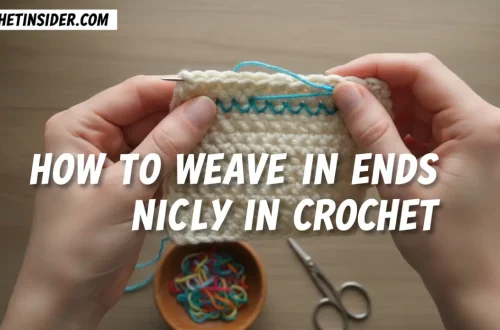
- Weave in Ends Before Joining: Seriously. Dealing with dozens of loose ends while trying to align squares is a special kind of torture. Weave them in as you finish each square.
- Plan Your Layout: Lay all your blocked squares on the floor or bed in the pattern you want. Take a photo! This is your map. Join in manageable sections (e.g., join squares into rows first, then join the rows).
- Use Locking Stitch Markers: When sewing or crocheting seams, use markers to pin squares together at the corners and midpoints to prevent shifting.
- Match Stitch for Stitch: Whether sewing or crocheting, always join corresponding stitches or spaces. Don’t join a stitch to a space unless the pattern specifically calls for it.
- Embrace the Process: Put on a long movie or podcast. Joining is meditative. It’s the calm, satisfying act of assembly after the creative storm of making the squares.
There’s no single “best” method—only the best method for *your* project and *your* patience level. Try a few on some spare squares to see which one speaks to you. Remember, the join is the final signature on your work. Make it intentional, and your granny square project will go from a pile of potential to a cherished, finished treasure.
Become a Joining Master:
- Start Here: The Complete Guide to Crocheting Granny Squares – Make perfect squares to join.
- Essential Prep: How to Block Squares for Perfect Joining – The non-negotiable step.
- Project Inspiration: Large Blanket Patterns Using Motifs – See joins in action.
- Finishing Touch: How to Neatly Weave in All Those Ends – Before and after joining.