I’ve taught a lot of people to crochet — my sister, two college roommates, a neighbor who still sends me pictures of her blankets — and the one thing they all said was: “Don’t just tell me what to do. Show me exactly how to do it, step by step, like I’m right next to you on the couch.” So that’s what we’re doing today. I’ll walk you through every single motion, from picking up your hook for the first time to holding your finished project and thinking “I actually made this.” No leaps of faith. No “then just crochet normally.” We’ll go inch by inch.
Get your supplies ready — the short list
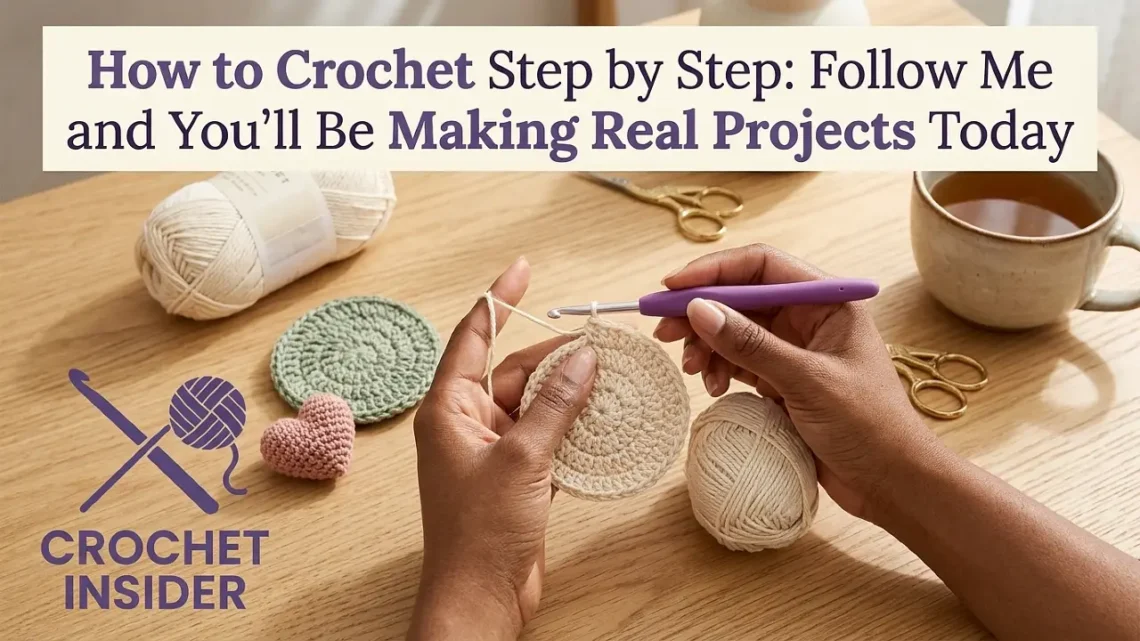
You don’t need a craft room full of gear. For this step‑by‑step session, grab just these four things:
🪝5.0 mm hook (H‑8)Aluminum or ergonomic — either is fine. I’m using my old Clover.
🧶Worsted weight #4 yarnLight color, smooth texture. Cotton is best for our project, but acrylic works too.
✂️ScissorsTo cut your yarn at the end.
🪡Yarn needleFor weaving in ends. We’ll get to that.
If you already read our complete beginner’s guide, you’ve seen the supply list. Now we’re going to actually use those supplies. Grab your hook and yarn — I’ll wait.
One quick recommendation
If you have a choice, pick a cotton worsted weight yarn in a solid, light color — pale yellow, soft peach, light grey, or cream. Cotton holds its shape beautifully for potholders, and light colors let you see your stitch definition. Dark yarn is beautiful but it’s like trying to learn calligraphy with a blindfold on.
Step 1: Slip knot — the real way to do it
I know, I know — “it’s just a knot.” But the slip knot sets the tone for your whole project. Too tight and you’ll fight every stitch. Too loose and the yarn will feel sloppy. Let me show you exactly how I do it after fifteen years.
1
Make a loop with the yarn tail hanging behindHold the yarn with the tail end (about 6 inches / 15 cm) dangling downward. Form a loop by crossing the working yarn (the strand that goes to the ball) over the tail. Think of a lowercase ‘e’ shape — the working yarn is the top curve, the tail is the stem.
2
Reach through with your hookInsert your hook into the loop from front to back. Then hook the working yarn (the strand coming from the ball) and pull it gently back through the loop.
3
Tighten gentlyPull both the tail and the working yarn at the same time to snug the knot up against the hook. The loop on your hook should slide easily along the shaft — not so loose it flops around, not so tight you have to yank it.
Here’s the test: put your hook into the loop and try to rotate it. If the loop spins freely around the hook, your slip knot is perfect. If it’s locked in place, loosen it by pulling the two strands apart slightly.
That’s it. One slip knot, and you’re officially crocheting. The rest is just variations of pulling yarn through loops.
Step 2: How to hold the hook and yarn without cramping
New crocheters often hold everything like they’re trying to strangle it. Relax your hands. I promise the yarn won’t escape.
The hook grip (two ways, both fine)
Pencil grip: Hold the hook like a pencil, with your thumb and index finger resting on the flat thumb rest. The hook points upward at a slight angle. This gives you a lot of fine control.
Knife grip: Hold the hook like a dinner knife — your hand rests on top, your thumb wraps around, and the hook points toward your opposite shoulder. I switched to this years ago because it hurts my wrist less during long evenings of crocheting.
Try both for a few rows. Neither is wrong. The “right” grip is the one that doesn’t make your hand ache after ten minutes.
The yarn tension hand (non‑dominant hand)
This matters more than the hook grip. You want a steady, even flow of yarn — not too tight, not too loose. Here’s what I do and teach:
Thread the yarn between your pinky and ring finger, over your ring finger, under your middle finger, and over your index finger.
Your index finger acts like a guide — you can raise it to loosen tension or lower it to tighten.
The yarn should glide smoothly when you pull, but not fall slack.
The “vegetable peeler” trick
Imagine you’re holding a vegetable peeler in your non‑dominant hand, with your index finger extended slightly. That’s the shape you want. And please — relax your shoulders. I can’t see you, but I know you just tensed them. Let them drop.
Step 3: The foundation chain — your first actual stitches
The chain is the starting line for almost every crochet project. Think of it as laying down railroad tracks — you need them straight and even before the train (your rows) can run smoothly.
1
Yarn over (YO)With your slip knot on the hook, wrap the working yarn from back to front over the hook. The hook should catch the yarn in its throat (the narrow part).
2
Pull through the loopRotate the hook slightly downward and pull the yarn through the loop that’s already on your hook. Congratulations — that’s one chain stitch.
3
Repeat 20 timesKeep going: yarn over, pull through, yarn over, pull through. After each chain, look at the neat little V shapes forming. Each V is one chain. Don’t count the loop on your hook — that’s not a stitch yet.
If your chain looks twisted or uneven, slow way down. Watch exactly where the hook enters the loop. Most beginners rush. I did too. Speed comes from muscle memory, not effort.
Practice making chains until they look relatively uniform. They don’t have to be perfect — mine weren’t. But if you can make a chain of 20 and the V shapes are roughly the same size, you’re ready for the next step.
Step 4: Your first row of single crochet — yes, you
Now we turn those chains into actual fabric. This is where it starts to feel like real crochet.
1
Skip the first chain from the hookLook at your chain. The loop on your hook is not a stitch. The first V right next to the hook is the first chain. Skip it. Insert your hook into the second chain from the hook (under both top loops of the V).
2
Yarn over and pull up a loopWrap the yarn over the hook (YO), then pull it back through the chain stitch. You now have 2 loops on your hook.
3
Yarn over and pull through both loopsYO again, and draw the yarn through both loops on the hook. You’ve just made one single crochet (sc).
4
Repeat across the chainInsert hook into the next chain, YO, pull up a loop (2 loops on hook), YO, pull through both. Keep going until you’ve worked into every chain except the very first one you skipped.
Your first few single crochets will feel awkward — like learning to use chopsticks. That’s fine. After about 10 stitches, your hands start to figure it out. After 50, it feels natural. Trust the process.
When you reach the end of the chain, you’ve completed Row 1. Look at it. That’s fabric. You made fabric from a string. Pretty magical, right?
Step 5: Turning your work and building rows
To start Row 2, you can’t just keep going in the same direction — you’d run out of chain. You need to turn your work and add a “turning chain” to reach the right height.
1
Chain 1Make one chain stitch (YO, pull through). For single crochet, this chain 1 is your turning chain. It does NOT count as a stitch.
2
Turn your work counter‑clockwiseFlip the piece like turning the page of a book. Your hook will now be at the right‑hand side (if you’re right‑handed). The wrong side of the fabric may be facing you — that’s fine.
3
Work into the first stitch (not the turning chain)Insert your hook under both loops of the first single crochet from the previous row (the one closest to your hook). YO, pull up a loop, YO, pull through both. That’s your first stitch of Row 2.
4
Sc in each stitch acrossContinue single crocheting into every stitch until you reach the end of the row.
When you finish the last stitch of the row, you should be at the edge. Chain 1, turn, and start again. After a few rows, you’ll notice a rhythm: chain 1 (turn), sc across, chain 1 (turn), sc across. That rhythm is your friend.
Step 6: Counting stitches (the secret to not losing your mind)
Almost every beginner’s first project ends up looking like a trapezoid — wider at one end than the other. That’s because they accidentally added or dropped stitches at the edges. Counting stitches at the end of each row will save you hours of frustration.
How to count single crochet stitches
In a row of single crochet, each stitch looks like a little V from the top. Count each V. Don’t count the turning chain (it’s just hanging out at the edge). Do count the very first stitch of the row — it can look a bit squashed, but it’s there.
For our practice: Start with a foundation chain of 12. Your first row of sc should have 11 stitches (because you skipped the first chain). Then every row after that should also have 11 stitches. Write “11” on a sticky note and keep it next to you. After each row, count. If you get 12 or 10, you know something happened and you can fix it right away instead of discovering a disaster ten rows later.
If your stitch count is off, don’t rip everything out in despair. Look at the last few inches — you probably missed the last stitch (it likes to hide) or added an extra one near the edge. We’ll cover fixes in the troubleshooting section.
Step 7: Follow me — make a simple potholder start to finish
Let’s put all these steps together into an actual finished object. This potholder is small (about 15 x 15 cm / 6 x 6 inches), useful, and only uses single crochet. You’ll see your progress in one sitting.
Gauge: 14 sc x 16 rows = 10 cm (not critical for this project)
Abbreviations
ch — chain
sc — single crochet
st(s) — stitch(es)
t-ch — turning chain
Foundation:Ch 14 (this gives you 13 stitches after the first row — a nice square size).
Row 1:Sc in 2nd ch from hook and in each ch across. (13 sc). Ch 1, turn.
Rows 2–16:Sc in each sc across. (13 sc). Ch 1, turn.
After Row 16:Do not ch 1 or turn. Fasten off (leave a 15 cm / 6 inch tail).
Row by row, step by step: After each row, count your stitches. If you have 13, great. If you have 12 or 14, look at where you started and ended — did you skip the first stitch? Did you accidentally sc into the turning chain? Fix it now. By Row 5, your hands will start to memorize the motion. By Row 10, you’ll be watching TV while you crochet.
Once you finish the 16 rows, you’ll have a square. It won’t be perfect. Maybe the edges wobble a bit, maybe some stitches are looser than others. That’s not failure — that’s your first real crochet project. I still have the wobbly dishcloth I made in 2010. It’s ugly and I love it.
Step 8: Fasten off and weave in ends like a pro
Finishing a project properly makes the difference between “it looks handmade” and “it looks homemade (in a bad way).” Don’t skip these two steps.
Fasten off (closing the last stitch)
1
Cut the yarnAfter your last stitch (the last single crochet of Row 16), cut the yarn leaving a 6‑inch tail. Don’t cut it right at the knot — give yourself room.
2
Pull the tail throughYarn over and pull that tail completely through the loop on your hook. Pull gently until the loop disappears and you have a little knot. That’s fastened off — your stitches will never unravel.
Weave in ends (so they don’t poke out)
Thread the tail onto your yarn needle. Then weave it through the backs of several stitches in the same direction, then reverse direction and go back through a few more. Snip the remaining tail close to the fabric. Do the same with the tail from your slip knot at the start. Now your potholder looks clean on both sides.
Don’t just knot and cut
I see beginners tie a little knot and snip right at the knot. That’s a disaster waiting to happen — after one wash, the knot works loose and your project starts falling apart. Weaving in ends takes two minutes and makes your work last for years.
Step 9: What to do when something looks wrong
Something will look wrong. That’s not a sign you’re bad at crochet — it’s a sign you’re paying attention. Here are the most common step‑by‑step problems and exactly how to fix them.
📏
My row has 14 stitches instead of 13You probably worked into the turning chain from the previous row by mistake. The turning chain (ch‑1) looks like a little bump at the edge — don’t put a stitch into it.Fix: Unravel (frog) back to the start of the row by gently pulling the yarn to remove stitches one by one. Then rework the row, making sure to skip that turning chain.
🔍
I can’t find the last stitch of the rowThe last stitch of a row often twists or sits lower than the others. It’s there, I promise.Fix: Tilt your work and look for the two loops that make a V shape right at the edge. If you still can’t find it, stick a stitch marker into the top of the last stitch immediately after you make it. Then you’ll know exactly where to work on the next row.
🌀
My foundation chain is twistedWhen you start row 1, the chain might be coiled like a phone cord. That’s normal for the first few stitches.Fix: As you work your first row, straighten the chain with your fingers every couple of stitches. Once you’ve finished row 1, the twist usually disappears. If it doesn’t, you might have worked into only one loop of the chain instead of both — that makes the edge curl. Practice a small chain again, making sure to insert under both top loops of each V.
✋
My hand hurts after 10 minutesYou’re gripping the hook too tightly or holding your tension too high. This is extremely common.Fix: Put everything down. Shake out your hands. Then pick up your hook and yarn again — this time, crochet as loosely as you possibly can, even letting the yarn feel a little sloppy. Your stitches will look bigger and maybe uneven, but your pain will go away. You can tighten your tension gradually over time. A relaxed crocheter is a happy crocheter.
For a deeper dive into fixing mistakes, check out our full troubleshooting archive — I’ve written detailed posts on each of these problems.
Where you go from here
You’ve gone from slip knot to finishing your first real project. That’s huge. Most people who buy hooks and yarn never make it this far — but you did. Now let’s keep that momentum going.
Your next step‑by‑step adventure
The single crochet potholder is just the beginning. Here’s what I recommend you learn next, in order:
Made your potholder? I’d love to see it. Join the Crochet Insider community — members get video walkthroughs of every step in this guide, printable stitch charts, and a new beginner project every month. Launching soon! 🧶