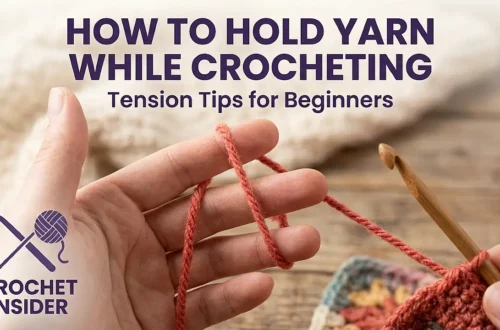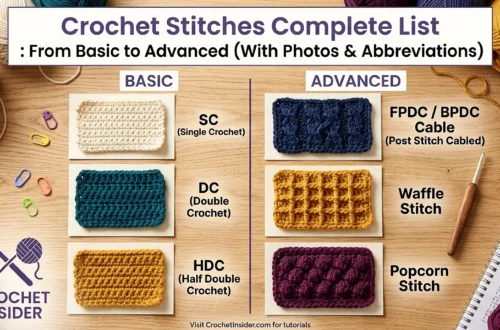
Imagine you’re learning to cook. Before you tackle a soufflé, you need to know how to chop an onion, boil water, and crack an egg. Crochet is the same. Before you can make that dream cardigan or cuddly toy, you must become fluent in the language of loops. That language is built on just four fundamental stitches: Chain (ch), Single Crochet (sc), Double Crochet (dc), and Treble Crochet (tr).
I remember my early swatches—a wobbly, hole-riddled mess where my doubles looked like triples and my edges curled into scrolls. I was following instructions but not understanding the architecture of each stitch. In this guide, we won’t just go through the motions. We’ll dissect each stitch like a scientist. You’ll learn exactly where your hook should go, what the yarn is doing, and—most importantly—how to recognize and fix each stitch when it goes wrong. By the end, you won’t just know how to make these stitches; you’ll understand them, which is the key to confidence in every future project.
The First Building Block: The Chain Stitch (ch)
Purpose: The foundation. It’s the starting row (foundation chain) for most projects and the “ladder” (turning chain) that gets you up to the height of the next row.

How-To & Anatomy:
- Start with a Slip Knot: This is your first, adjustable loop on the hook. It’s not counted as a stitch.
- The Motion: Yarn over (yo) the hook from back to front. Use the hook to catch this yarn and pull it through the loop already on your hook. One chain made.
- Key Insight: The loop on your hook after pulling through is not the stitch you just made; it’s the live loop ready to make the next stitch. The chain stitch is the “V” shape below it.
Pro Tip for Success: Keep your foundation chains LOOSE. A tight foundation chain is the #1 reason beginners can’t get their hook into the first row. Use a hook one size larger just for the starting chain, or consciously relax your yarn tension. You should be able to see the distinct “V” of each chain clearly.
The Workhorse: Single Crochet (sc)
Purpose: Creates a dense, tight, warm fabric. Perfect for amigurumi, dishcloths, baskets, and the brims of hats.

How-To & Anatomy:
- Insertion Point: Insert your hook under the top two loops of the “V” of the stitch in the previous row (or into the desired loop of your foundation chain). For now, use both loops—it’s called working “through both loops” and gives a flat fabric.
- Pull Up a Loop: Yarn over and pull up a loop. You now have two loops on your hook.
- Complete the Stitch: Yarn over again and pull through both loops on your hook. One single crochet complete.
What It Looks Like: A short, compact, square-like stitch. From above, the top looks like a tight “V” or a cross (+).
Common Mistake & Fix: Only going through one loop creates a ribbed fabric. This is actually a technique called “back loop only” (BLO) used intentionally for texture. For standard sc, ensure you get both strands of the “V”. If you accidentally work in BLO for a whole row, your piece will have a distinct ridge. You can either embrace it as a design element or frog back and fix it.
The Speed Demon: Double Crochet (dc)
Purpose: Creates a taller, more open, and drapier fabric. Works up quickly. The star of afghans, shawls, lightweight sweaters, and lace patterns.

How-To & Anatomy (The “Yarn Over First” Stitch):
- Yarn Over (yo): Before inserting your hook, wrap the yarn over the hook from back to front. This is the defining move for all taller stitches.
- Insert & Pull Up: Insert your hook into the stitch, yo, pull up a loop. You now have three loops on your hook.
- First Pull-Through: Yo, pull through the first two loops on your hook. You now have two loops remaining.
- Final Pull-Through: Yo, pull through the last two loops. One double crochet complete.
What It Looks Like: A tall, distinct “post” or trunk. From above, the top looks like a “V” but is wider apart than an sc. The turning chain for a dc row is typically 3 chains, and it often counts as the first dc of the new row. This is critical for maintaining correct stitch counts!
Common Mistake & Fix: Forgetting the initial yarn over. If you start a dc like an sc (insert hook first), you’ll end up with a weird, tight knot that’s not a proper stitch. If you catch it immediately, just pull out and restart. Also, losing count mid-stitch (is it 2 loops or 3?) is common. Go slow and say the steps out loud: “Yo, insert, pull up (3), yo pull through 2 (2), yo pull through 2 (1).”
The Lace Maker: Treble (or Triple) Crochet (tr)
Purpose: Creates a very tall, open, and lacy fabric. Used for quick, airy blankets, fancy edgings, and dramatic lace shawls.
How-To & Anatomy (It’s Just More Yarn Overs):
- Yarn Over TWICE: Wrap the yarn over your hook two times before inserting.
- Insert & Pull Up: Insert hook, yo, pull up a loop. You now have four loops on your hook.
- Pull-Through in Stages:
- Yo, pull through the first two loops (3 loops left).
- Yo, pull through the next two loops (2 loops left).
- Yo, pull through the final two loops. Complete.
Memory Aid: The number of times you pull through two loops equals the number of initial yarn overs. For tr (2 yarn overs), you pull through 2 loops three times.
Pro Tip: Because the tr stitch is so tall, it can lean and create bias (a diagonal slant) if not balanced in a pattern. It often looks stunning paired with shorter stitches in a shell stitch pattern.
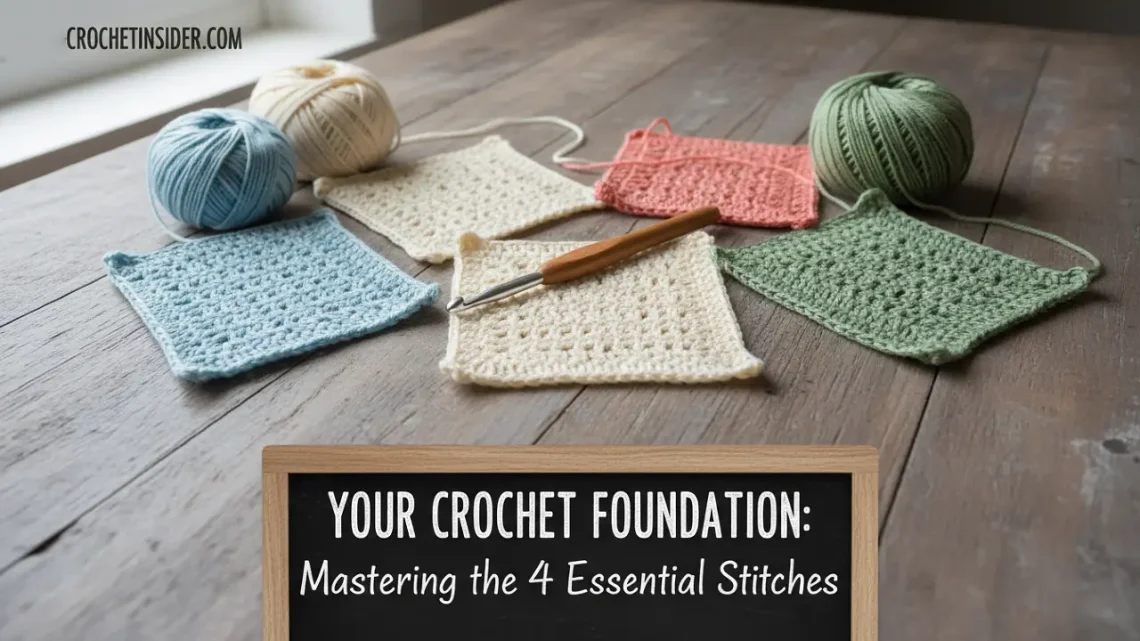
Putting It All Together: Your First Practice Swatch
Don’t just make random stitches. Create a structured sampler to feel the difference.
- Foundation: Chain 20 loosely.
- Row 1 (Sc): Sc in the 2nd ch from hook and in each ch across. (19 sc) Ch 1, turn. Note: The ch-1 is your short turning chain for sc; it usually does NOT count as a stitch.
- Row 2 (Sc): Sc in each st across. (19 sc) Ch 3, turn. Note: The ch-3 is your tall turning chain for dc; it WILL count as your first dc.
- Row 3 (Dc): Dc in the next stitch (not into the base of the turning chain). Dc in each st across, working the last dc into the top of the turning ch from Row 1. (19 dc total, with the ch-3 counting as 1). Ch 4, turn. The ch-4 is for tr.
- Row 4 (Tr): Tr in the next stitch and in each st across, last tr in top of turning ch from Row 2. (19 tr). Fasten off.
Analyze Your Swatch: Lay it flat. Feel the density of the sc rows versus the airy drape of the tr row. See how the edges behave? This tangible understanding is priceless. Keep this swatch as a reference!
Beyond the Basics: Half Double Crochet (hdc) – The Bonus Stitch
Once you’re comfortable with sc and dc, you’ll meet the wonderful hybrid: the Half Double Crochet (hdc). It’s taller than sc but shorter and thicker than dc.
- Yarn Over (like a dc).
- Insert hook, yo, pull up a loop (3 loops on hook).
- Yarn Over and pull through ALL THREE loops at once. That’s it!
Mastering these stitches is like learning your scales in music. Practice them until your hands move without you having to think. Then, you’ll be ready to play any symphony—or in our case, crochet any pattern—you desire.
Ready to Build with Your New Stitches?
- Next Step: How to Work in the Round vs. Rows – Use your stitches to make shapes.
- Shaping 101: How to Increase and Decrease – Make more than just rectangles.
- Your First Real Project: A Simple Guided Idea – Apply your skills.
- The Secret to Pro Results: Mastering Tension & Gauge – Make your stitches consistent.