The chain stitch is the very first thing I teach anyone who wants to learn crochet. It’s the “A” of the crochet alphabet – simple, foundational, and absolutely everywhere. Without the chain, you can’t start a project, you can’t create height between rows, and you can’t make lace or spaces. But here’s the good news: it’s also the easiest stitch to learn. In this guide, I’ll walk you through the chain stitch step by step, show you the most common mistakes (and how to fix them), and even give you 10 projects you can make with nothing but chains. Yes, really.
What is a chain stitch? (And why it matters)
A chain stitch is a series of connected loops that looks like – you guessed it – a chain. In crochet, it’s abbreviated as “ch” in patterns. You’ll see it everywhere:
- As a foundation: Most projects start with a chain (called the “foundation chain”).
- As a turning chain: At the end of a row, you chain 1, 2, or 3 to reach the height of the next row.
- As a decorative element: Chain spaces create lace, mesh, and granny square corners.
- As a project by itself: Believe it or not, you can make scarves, bags, and jewellery using only chains.
If you can make a chain, you’ve already started crocheting. Everything else is just variations of pulling yarn through loops.
The slip knot – where every chain begins
Before you can chain, you need a slip knot on your hook. Here’s how I make one (and how I teach it).
Now you’re ready to chain. Keep that slip knot on the hook – it’s your first “loop.”
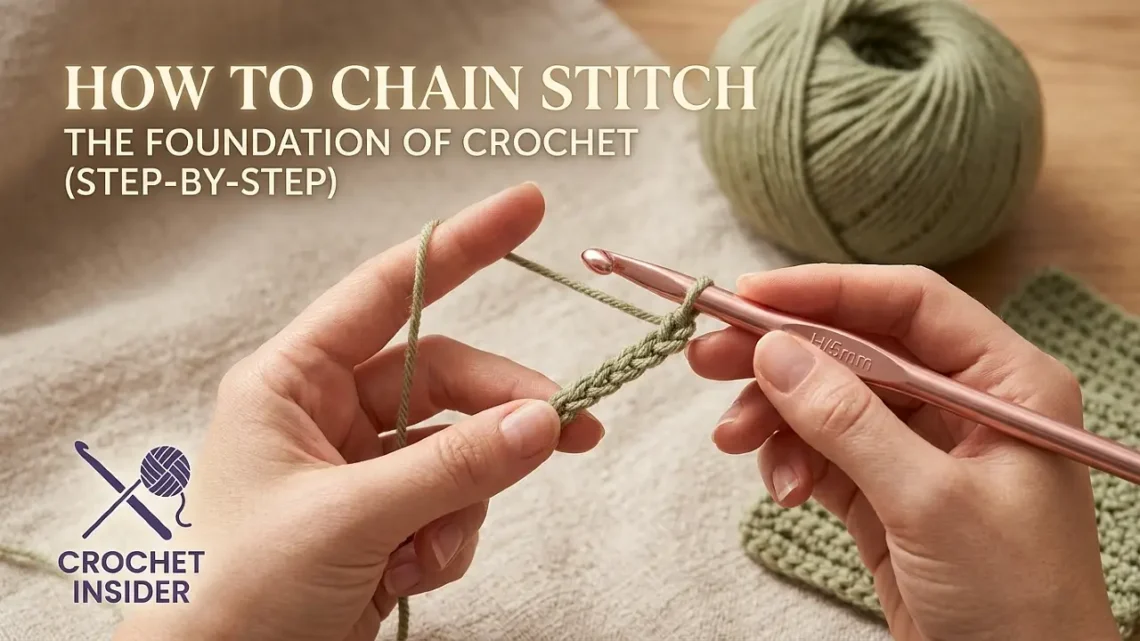
Step‑by‑step: how to make a chain stitch
With your slip knot on the hook, let’s make some chains.
That’s it. You’ve just done the chain stitch. Now make 20 more. Then 50. Muscle memory is built through repetition.
How to keep your chains even (tension tricks)
Uneven chains – some loose, some tight – are the #1 beginner frustration. Here’s how to fix it.
Tip 1: Relax your grip
Most beginners hold the hook and yarn too tightly. If your hands ache after 2 minutes, loosen up. The yarn should glide, not fight.
Tip 2: Use the hook to control loop size
When you pull through, let the hook determine the size of the loop. Don’t pull the yarn taut after each stitch. The hook’s shaft is the “ruler” – all your loops will be the same size if you just let it rest on the thickest part of the hook.
Tip 3: Go up a hook size for the chain only
If your foundation chain is always too tight, use a hook one size larger just for the chain, then switch back for the rest of your project. This trick has saved many blankets.
Tip 4: Practice without purpose
Take a scrap of yarn and make a chain as long as your arm. Then unravel it and do it again. Tension improves with practice, not with perfect projects.
6 common chain stitch mistakes (and fixes)
How to count chains (and why the loop on the hook doesn’t count)
This trips up almost every beginner. Here’s the rule:
The loop on your hook is NOT a chain stitch. It’s the working loop. The chains are the V‑shaped loops below the hook.
To count your chains, look at the front of your work. Each V is one chain. Do not count the loop on the hook. Also, do not count the slip knot (it’s not a chain).
If you chain 20 times, you will have 20 V’s and one working loop on the hook.
Practice: Make a chain of 10. Then count the V’s. If you see 10, congratulations. If you see 9 or 11, do it again. Counting accurately matters for patterns – if your foundation chain is off by 2, your whole project will be off.
10 projects you can make with only chains
Yes, you can make real, useful things using only the chain stitch. Here are 10 ideas (perfect for practising).
Chain‑Only Project Ideas
Absolute beginnerBeyond the basic chain: foundation single crochet (FSC)
One common complaint about chains: the foundation chain can be too tight or hard to work into. The solution is the foundation single crochet (FSC) – a combination of chain and single crochet that creates the foundation and the first row simultaneously.
FSC is a bit more advanced, but once you learn it, you’ll never go back for some projects. I have a full tutorial in our FSC guide. But for now, master the basic chain first.
Practice exercises to master the chain
Here’s how I get my students fluent in chains:
- Exercise 1: The 10‑chain challenge – Make a chain of 10. Count it. Unravel. Do it again. Repeat 20 times.
- Exercise 2: The long chain – Chain until you run out of yarn. Watch how your tension evens out after the first 30 chains.
- Exercise 3: Chain to a beat – Put on music. Chain one stitch per beat. This helps develop a consistent rhythm.
- Exercise 4: Blind chain (advanced) – Once you’re comfortable, try chaining while looking at something else (like the TV). Your hands should know the motion.
Do these for 10 minutes a day, and within a week, you’ll be able to chain without thinking.
You’ve mastered the chain – now the world opens up
The chain stitch is the key to everything. Once you can chain comfortably, you can start any project, follow any pattern, and create any stitch. From here, you’ll learn single crochet, double crochet, and the rest. But never forget where you started: with a simple loop and a hook, making V after V after V.


